Showing posts with label fabric. Show all posts

Wednesday, October 10, 2012

Vintage Chair Make Over


 I bought this great/ugly vintage chair for $10 and couldn't wait to spruce it up. Just a couple coats of yellow spray paint and some new faux bois fabric on the seat. Voila! An updated chair for $20 and an easy half-days work. 


Unfortunately, I couldn't quite get a yellow that matched with the art in my bedroom (more on that next time...) so I sold it. For $40. Woo Hoo! I love DIY. But I am still looking for another chair...

Friday, October 28, 2011

Easy-Peasy DIY Wall Art


I found this genius idea somewhere on the world wide web and had to use it immediately! We're slowly re-decorating our house and there was a perfect unused spot on the wall for these little gems. All you need are embroidery hoops and fabric. So easy, and so darling!

Wednesday, October 12, 2011

Fabric Covered Bulletin Board


 This is such a super easy project that made the colors in my craft room really come together. A lovely friend of mine gave me a bulletin board with a pretty frame for my birthday, and now that I've added my fabric it looks double-amazing! I think I shall call it "almost art".


All I had to do was take the cork board out of the frame, cover with fabric and put it back in. I didn't even staple or tape it. Now, when my son draws me a picture we cut a piece out and tack it on the board, the rest goes into the recycling. I'm very glad he doesn't get too attached to his pictures!

Tuesday, August 9, 2011

Patchwork Market Bag


Look what I made! I wanted to try my hand at incorporating simple patchwork into a non-quilt project. Turned out to be a lovely gift for a lovely girlfriend!


I used Hilda's technique for stamping with fabric paint to add a personal touch. Adorable from the back and front!


Wednesday, July 13, 2011

Fancy Pants


I made my first pair of pants! Think of all the money I'll save...ahhh.

I'm so grateful for awesome tutorials at Made By Rae. I love the seersucker fabric and how simple they were to make. I made some mistakes and they're way too small, but I know I can nail it next time!

Tuesday, June 14, 2011

Sewn Climbing Bear Toy Tutorial


I am endlessly impressed by Made by Joel. He makes such beautiful, simple, wonderful things! I recently came across his Climbing Gorilla tutorial and found myself wishing (again) that I knew how to woodwork. I looked around for a tutorial for someone who doesn't have tools at home and I couldn't find much. And is I was looking, someone else might be too. Here's what I came up with:


Supplies:
Wool Felt (I used an old, felted sweater scrap)
Beans
Yarn or String (aprox 3 feet)
2 Medium Sized wooden beads
Pattern

1.) Print the pattern at the bottom of this post (should be 4.5"x4.5", or desired size) and cut it out.

2.) Cut 2 bears out of felt.

3.) Pin and sew along dotted lines. Leave gaps right through the middle of the arms for the string. Make sure to backstitch when stopping and starting. Notice that the bear has dotted lines from shoulder to armpit? Sew there! That's so beans don't wiggle out of his middle and through the string holes. Be sure to leave a gap to stuff him!

4.) Fill the bear with dried beans or dried peas. Don't pack them in too tight. If he's too heavy it will put unnecessary stress on your seams...and who wants to re-sew anything?

5.) Sew opening shut.

6.) Feed string through the holes, top to bottom. Tape the ends with scotch tape to make it easier! Tie beads at the ends of the string.

7.) Done! Now you hang it on a door know and practice wiggling the strings back and forth to make the bear shimmy up and down!

And here is a no-sew, no-tool version.

Monday, June 13, 2011

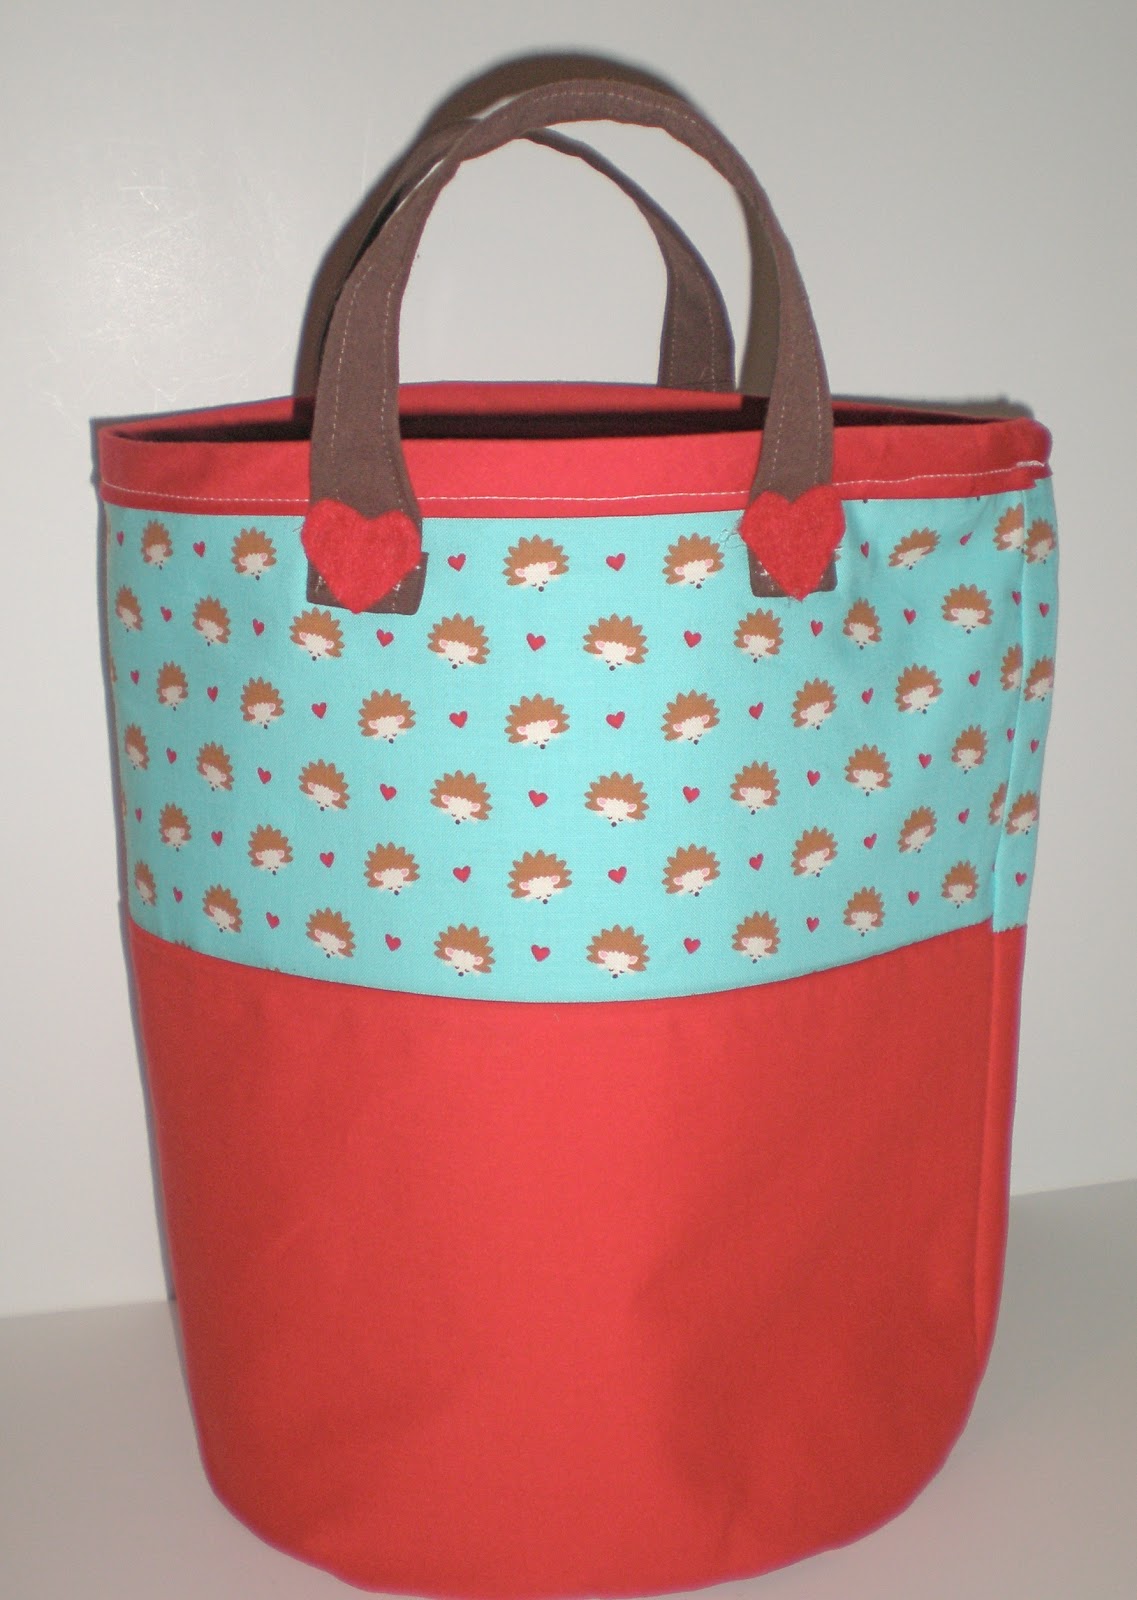
Hegehog Themed Baby Shower Gift

I've outdone myself! My first baby gift basket was cute, but this one is to die for!


It all started with finding this adorable wooden hedgehog clock at Superstore. I knew it would look perfect in my goddaughter's room, although I was tempted to keep it for myself!

I found this great hedgehog softie tutorial and whipped one up right away in Michael Miller's Hegehog's color scheme.


I added a Bagsket to hold it all, and although the colors won't match baby's room, it will be a great tote for car toys.


Next month, I plan on hosting a second shower for a different crowd and I have a few things up my sleeve for my little peanut. Can't wait to show you!

Tuesday, April 19, 2011

I Spy Quilt (or: Quilting Madness)


Wow. Quilting is SO hard!

I have so many adorable fabrics, that I love and haven't wanted to part with. I though I could just whip up a simple little quilt (I can hear all you seasoned quilters laughing) for Daniel using lots of prints and keep the fabrics I love forever. The problem is, I'm not very precise and I had no idea what I was doing!

I'm pretty sure none of my squares were the same size. I learned that scissors are a bad tool for quilting. I should have bought a big cutting mat and quilting ruler before I started. I own one now! So I did what any reasonable person would do when that have completely botched a project- call my sewing-savvy Mother in Law! She resurrected it for me and taught me a lot of little tricks on the way.

Now, I'm pretty happy with how it turned out, offset lines and all! I think Daniel is going to love it. My plan is to give it to him on the plane to keep him busy and cozy. But we all know how obsessive I am about travel activities....

You Might Also Like:

Related Posts Plugin for WordPress, Blogger...