Showing posts with label girl. Show all posts

Monday, April 2, 2012

First I Spy Quilt for Sale


I finally got the nerve to list my 'Cotton Candy' I Spy quilt. I'm not sure why I was worried about posting. I think pricing quilts is just challenging! I'm hoping to have the boy quilt finished sometime this month, it's going to be adorable.


Tuesday, October 25, 2011

Craft Kit: Creative Birthday Gift


Daniel had a party to go to this weekend, and I wanted to send him with something useful, that the parents and child would be glad to have!  I found a cardboard suitcase at Homesense and filled it with craft supplies.


Here's what we put inside:
Ruler Box with pencil crayons inside
Unfinished wooden box
People Pegs
Beads
Mini Easel and Canvas
Scissors
Paint
Alphabet Stickers
Craft Foam
Glue Tape
Clothes pins
Notebook


I personalized it by stamping "Aubrey's Craft Kit" on paper and sticking it to the inside of the lid. There are all sorts of more fancy ways I could have done it, but we were short on time!

Monday, October 17, 2011

Quiet Book #2- Around The House


Bring something cool and handmade to a baby shower, and you can bet you'll be making it again! Here's my second attempt at a simplified quiet book. I just couldn't find another 9 hours in my schedule to make a second 8-page book! I made it in an 'Around the House' theme, since children love to mimic adults more than anything.


Since it was a smaller book, I added a memory matching game (the bag is sewn in) on the inside cover. I think it fits with the theme of household activities, and little one can pretend to wash them, or add clothespins for some extra fun. The flowers button off for practice buttoning, just like the button snake. It's a great time-killer!


A simplified version of the oven and cookies, and a new addition. I adore this little garden, with it's package of seeds and watering can! I used fabric markers all through this book to speed the process up. It's so much faster than embroidering, and more fun too.


I love this idea for practice with brushing or braiding. It's a bit girly, and I usually try to make them unisex so they can be passed down, but I couldn't resist! The back cover has a pocket to add pieces for any of the activities, or paper and pencil.


Sending it for a test run to make sure it's as cool to a kid as it is to me!

Thursday, September 29, 2011

Mini I-Spy Doll AND Tummy Time Quilt


Here is the mini I spy quilt I made for my goddaughter. Part of the Baby Shower gift basket. I made it big enough for tummy time, but small enough to use as a doll quilt when she's a little bigger, about 32"x 32".


I adore I spy quilts, but I really hate quilting, so mini is perfect! I decided to round the corners, use a zig zag stitch and embrace the quirkiness of my quilting skills. At least on the second attempt, the squares all lined up!


I've also finished my first I Spy crib quilt for sale. This one is not quirky at all! Just plain cute. I'm debating about listing it in my shop. I really love the cotton candy colors!


And last but not least, this little gem that's already been snatched up! I used a simple, self binding method and I think it may have won me over to quilting! It's so much easier.

Saturday, September 24, 2011

Girly Baby Shower: Candy Buffet, Dolies and Tissue Paper Flowers


I finally organized the long-awaited shower for my little goddaughter! Our theme was "sweet" with super-girly decor and a candy buffet. I used glass jars, milk jugs and bowls to display the candy. The little sugar tongs were a nice (and sanitary!) touch.


I taped multiple doilies together (on the underside) in varying sizes to make runners for the candy buffet. I also cut small doilies in half and quarters to embellish the brown paper candy bags. I think they might be my favorite touch! The saltwater taffy, gourmet mini lollypops and cotton candy were some of the biggest hits.


I made the doily bunting with large and small doilies and craft string. I used two sizes, folding some in half (and gluing with stick glue) and leaving some round (either tape onto string or sandwich 2 doilies and glue) in a random pattern. I left about 4-8" between each. 


The tissue paper flowers were made from a Martha tutorial. Rather than floral wire I used white twist ties. For the bunting, you just cut down the tissue paper into quarters and tie them onto string before fluffing them out.


Here are our guests of honor; Mama and Little A, and the basket of goodies I made as the gift. I can't wait to show you what's in that basket, but this post is getting a little long!


Little one enjoying her teething ring. Babies LOVE these! They're my favorite shop item. I think...


My little Peanut and I. What a darling. I'm so lucky to be her godmama!

Monday, August 8, 2011

Daniel's 4th Birthday Carnival!


Some photos from Daniel's party. Such fun! My favorite touches are the popcorn boxes, the prize table and the ridiculous attempt I made at turning our shed into a big top with vinyl tablecloths.


We had face painting, tattoos, a prize table, cupcakes, and carnival music. A friend of our juggled for us (so grateful for you Rochelle, Ben, Mom, Natasha and Anna!) and played juggling games with the kids.


Game Ideas:

Squirt n' Win: Set 3 gold tees up on a foam block and top with ping pong balls. Squirt off with water guns (or in our case, squirt animals!)

Bowling: We set one of my mini bowling sets up on a long desk top (removed from the base) and let the kids go nuts.

Fishing: I bought a plastic fishing set from the dollar store (I wanted to make a felt or wooden one, but I'm not Martha...) and put them in a bucket of water.

Beanbag Toss: Always a favorite!


We gave out one ticket for trying and two for winning. The prizes ranged from 1-6 tickets.

I wanted to play a a basketball game (since we already have a little hoop) and a sidewalk chalk target with wet sponge type game, but it was SO busy! The biggest hit of all was definitely the prize table though! It was packed with all kinds of prizes (shopping for a few weeks in clearance sections made for a fun selection of great toys).


Monday, June 13, 2011

Hegehog Themed Baby Shower Gift

I've outdone myself! My first baby gift basket was cute, but this one is to die for!


It all started with finding this adorable wooden hedgehog clock at Superstore. I knew it would look perfect in my goddaughter's room, although I was tempted to keep it for myself!

I found this great hedgehog softie tutorial and whipped one up right away in Michael Miller's Hegehog's color scheme.


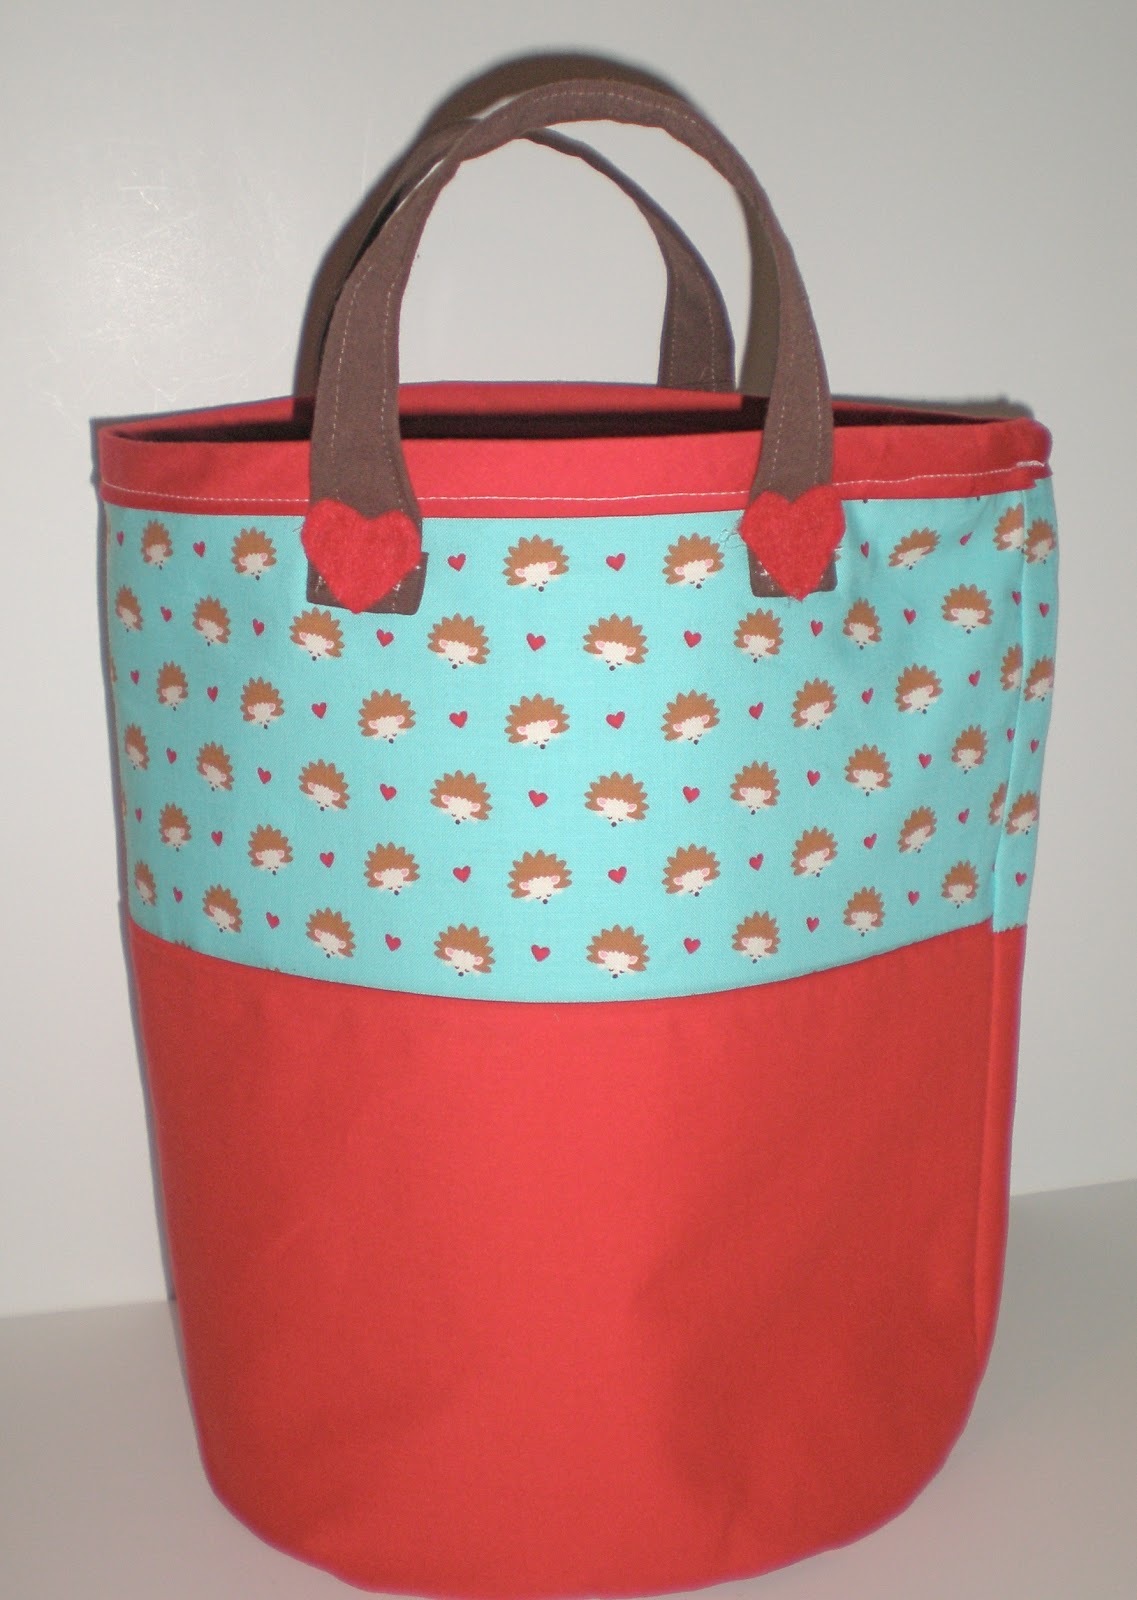
I added a Bagsket to hold it all, and although the colors won't match baby's room, it will be a great tote for car toys.


Next month, I plan on hosting a second shower for a different crowd and I have a few things up my sleeve for my little peanut. Can't wait to show you!

Friday, June 10, 2011

Perfect Little Hedgehog Softie

Look what I made!


Cute...right? I made it for a baby gift, but what I really love about this pattern is that it's perfect for anyone. It could be made smaller and used as a key chain for a teen or it can be a money or chapstick holder for a tween or school-ager. It's a great baby toy or make a few and voila! A family of Hedgehogs for a preschooler.  It would even be a great gift card holder and it's gender-neutral. I'm in love.


 The only things I changed were that I embroidered the nose rather than attaching felt (seemed safer since it's for a baby), I made the felt spikes into loops so I can attach baby links and I did a quirky little contrasting whip stitch as a finish rather than an invisible ladder stitch because I thought it suited my little guy.

Can't wait to show you the whole gift!

Tuesday, June 7, 2011

Travel Toys and Activities

#1- Crafts

I just realized that I still haven't posted photos of all the bits and pieces we took on our trip with us! Some were mainly for the plane, and some mainly for the hotel.

#2- Squinkies
#3- Activities

A couple of tips: save some "new" things for the way back, bring comfortable headphones for airplane television or iPod's and consider wrapping everything up in wrapping paper for little ones-it can keep them pretty busy!

#4- Thinking
#5- Busy Toys

#1- Crafts: Blackboard and Chalk (in a chalk holder) with eraser, crayons, notebook and stickers galore!
#2- Squinkies: I love these because they're tiny and lots of fun. We put them in a small tin from Michael's to keep them together.
#3- Activities: Jacob's Ladder, Button Snake and a lunch tin filled with puzzle erasers in a home theme.
#4- Thinking: Usborne's 'Things to do on a Journey', key chain measuring tape and tiny package of Megablocks (they were very popular in the hotel!)
 #5- Busy Toys: Wiki Sticks (Daniel's favorite of the trip), Silly bands (second favorite!), play doh (great for the hotel) and a locking diary. I thought the diary would be a huge hit, but the lock was too cheap and didn't work at all. Next time I'd buy a separate lock and key for entertainment.
#6- Things That Go: The roll up mat was pretty good on the airplane's tray table, but we used both of the car toys much more at the hotel. I really liked the little Tonka ramp because it was small and easy to pack, but lots of fun at the hotel.

Friday, July 23, 2010

Traveling Gnomes


I am always thinking of ways to keep Daniel entertained when we are shopping, in the car or at a restaurant. We have the standard travel toy ideas down. Stickers, doodle board, crayon roll, photo album, something with buttons, calculator, pipe cleaners, I-spy bottle, magnet games and on it goes.

When I was a little girl I had these cute
little dolls that clipped into jewelery that I would bring when my mom was meeting a friend for coffee. They were SO fun! I wish I have never sold them and I really I could remember what they were called. I was after the same sort of idea for Daniel, but what jewelry can you put on a boy?


I decided on a little, Waldorf gnome that fits into a pouch on a necklace. It was one of the first toys I've made that he actually liked. Well, for a few hours anyway. The little girl I take care of liked it so much that I made one for her too.

I read that it is wise to make the body first, because you can more easily make the head to fit the body than vice versa. I just winged it all. I free handed the bodies onto pattern paper and then cut and sewed. I usually make dolls too skinny so it took a few attempts. I wish I had made the hats a bit longer so I could knot them at the end; I like how the hat flops over when it's knotted. The head is just a ball of wool roving tightly wound. They joy of making little dolls is not having to fuss with the head!


I originally made a wool felt leaf for the gnome to fit in, but it just didn't work out that well. Since taking the photos, I've made him a crocheted pouch like the girl gnome. I crocheted a rectangle long enough to fold over into a sleeping bag. Before tying off, I chained to make the necklace and slip stitched it to the other side. Then to finish, I folded the rectangle up and stitched the sides together. It's a much better fit than the leaf!

You Might Also Like:

Related Posts Plugin for WordPress, Blogger...