Saturday, October 22, 2011
Easy Wooden Alphabet Blocks Tutorial
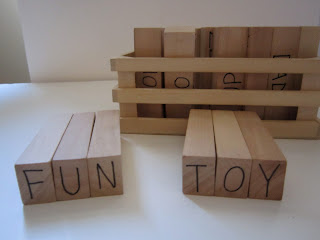
Here are a few lost photos of some ABC blocks I made for Daniel when he was learning his letters. He still loves them and now he's using them to spell. They're so easy to make!
Supplies:
Jenga Blocks (I used a no-name brand and saved a few dollars)
Permanent Marker, preferably non-toxic
Paper
Optional-Stencils, if you don't like drawing!
1.) Plan your simple drawings for each letter on the sheet of paper. Simple is best. Here are the objects I used, in alphabetical order:
Apple, Balloon, Candles, Duck, Egg, Fire, Gingerbread man, Hat, Ice cream, Juicebox, Kite, Leaf, Mittens, Nose, Oven, Pencil, Queen, Rabbit, Stars, Teepee, Umbrella, Vacuum, Watermelon, Xylophone, Yarn, Zipper.
2.) Start drawing! It only took me one evening for the whole project because I made everything as simple as possible. I drew the upper and lower case letter with a picture of an object starting with that letter on one side, and left the other blank. I repeated the capital letter on both ends of the block as well.
3.) I used a few of the extra blocks for simple sight words as well. Right after I gave Daniel his blocks, he saw a coupon (he had just turned 3) and said "Mommy, why does this paper say 'off'?" I just about fell over! I wrote one word on each side On/Off, Mom/Dad, Open/Close, Yes/No, Go/Stop, Hi/Bye etc.
This is a great gift because you can personalize it for your child with color, drawings and sight words that you think they'd enjoy!
Labels:
abc,
alphabet,
calgary craft sale,
cheap wooden toy,
children,
christmas gift,
easy,
educational,
gift,
handmade,
homemade,
how to,
kids,
no sew toy,
simple,
toy,
toys,
tutorial,
wooden
Subscribe to:
Post Comments (Atom)


I love this!! I was just reading another blog about using mod podge with pictures,http://www.mommymodelsblog.com/?p=2051 so I think I am going to cut out letters and pictures from old magazines to add a little flare. This is going to be fun!! Wish me luck!
ReplyDelete