Showing posts with label make. Show all posts

Thursday, October 25, 2012

Easy Homemade Lip Balm Recipe


This lip balm is the best. I've tried all sorts of expensive natural chapstick and been disappointed every time. When I started using my homemade stuff, I was able to go from constant, all day application to once in the morning and once at bedtime!


Ingredients:
2 tsp coconut oil
1 tsp beeswax
1 vitamin E capsule
5-10 drops of sweet almond oil 
*optional 5-10 drops essential oil such as sweet orange, peppermint, vanilla or cinnamon

Melt it all in a pan (be clever and use one that pours well) on low heat. If using essential oils, add after removing from the heat. Pour into containers.


Tips:
 *I bought a big brick of beeswax from a honey supplier. I use a sharp, heavy knife to shave off the wax and then pack it into the teaspoon. You can also buy beeswax in pellet form (much easier to deal with) or if you don't want to buy a lot of wax, a chopped beeswax tea light will do.
*Lip balm containers can be found at some health food stores or on Etsy
*I quadruple the recipe to fill approx 12-0.15oz containers (standard twist up size)

Wednesday, October 10, 2012

Vintage Chair Make Over


 I bought this great/ugly vintage chair for $10 and couldn't wait to spruce it up. Just a couple coats of yellow spray paint and some new faux bois fabric on the seat. Voila! An updated chair for $20 and an easy half-days work. 


Unfortunately, I couldn't quite get a yellow that matched with the art in my bedroom (more on that next time...) so I sold it. For $40. Woo Hoo! I love DIY. But I am still looking for another chair...

Friday, February 24, 2012

Easy Custom DIY Decor- Yarn and Twine Wrapped Ball Tutorial


Here's a super easy project that you can customize for your color scheme; yarn wrapped balls.

Materials:
Glue Gun or Glue Dots
Yarn/Twine/String/Rope
Styrofoam balls in desired sizes

Instructions:
1.) Glue one end of your yarn to the Styrofoam ball.
2.) Wrap and wrap until it's all covered and looks pretty.
3.) Cut the yarn and glue the other end down.

Yup, easy as 1-2-3. A cool DIY design project done in 20 minutes.


This would be a great housewarming or hostess gift! Easy, cheap, fast and made to co-ordinate with their decor!

Monday, November 28, 2011

Vintage and Salvaged Frames into Chalkboards: Tutorial


I ended up with an extra table to fill in a week at my last craft sale (don't ask...) and I wanted to make grown up things for a change. I went scouting at a few thrift stores and found some awesome frames. The plan was to spray paint the frames in nice lively colors and spray paint the glass in chalkboard paint, but as you know, something always goes wrong when I'm crafting something new!

What you need:
Frames
Chalkboard paint (spray or paint on)
Spray paint
Drop Cloth

It turns out that vintage frames are often made a lot differently than modern ones, which mean ripping out nails and hammering them back in and accidentally breaking glass that was seemingly permantently affixed. On one frame, it seemed that the glass was actually trapped in the wood somehow. On that one, I taped off the frame and painted, rather than spraying.

On the ones without glass, or where I broke the glass (wah!) I tried many things. First I called Michael's to ask about custom cut glass, but it was super expensive. Then I went to Home Depot to look for small cuts of sheet metal (magnetic!) or plywood, but no one could help me troubleshoot. I eventually came home and used some fiberboard/poster board from my office supply stash and it worked like a charm.

There was lots of troubleshooting, but the results were great, and people loved the big ones! I think I'll try it again, now that I know what I'm doing!

Tuesday, November 8, 2011

Ikea Hack: Lack Coffee Table into a Headboard


I feel like a genius! I'm always checking out Ikea Hackers and thinking how clever all the designers are, and now I've done it myself in less than 30 minutes!


We have a guest for the next few months and needed somewhere temporary, but comfortable for her to stay. I wanted to buy a bed frame, but when I realized my old Lack tabletop is the same length as a single bed, I got pretty excited.


I used a Magic Eraser (awful chemicals, but it did resurrect my old dingy table) to shine it up, and spray glued pieces of fabric onto the frame. I pulled the mattress out a couple inches and rested the headboard on the the box spring. Simple is usually the best.

Monday, October 31, 2011

No-Sew Franklin and Mrs. Turtle Costumes

We had a super-amazing church costume party on the weekend and here's how we went:


No sewing at all- my favorite. I cut the bellies out of fleece (you could use felt) and used quilters temporary spray glue to stick it to green shirts. I drew the lines with a brown fabric marker. Franklin's hat is a team hat that I covered with felt and adhered with the same spray glue.


My Mrs. Turtle necklace is made of purple ribbon and a wooden circle painted white.  Felt or a button would work for the charm as well. I used sticky velcro on the ends so it can come apart and hot glued the circle onto the ribbon.

We both had turtle-shell backpacks. One is a vintage ninja turtles backpack (doubles as a candy bag!) and the other was a handmade fleece kijiji find. I think one could definitely be made from fleece, hot glue, straps and stuffing in no time.

My little Franklin is just too cute!

Friday, October 28, 2011

Easy-Peasy DIY Wall Art


I found this genius idea somewhere on the world wide web and had to use it immediately! We're slowly re-decorating our house and there was a perfect unused spot on the wall for these little gems. All you need are embroidery hoops and fabric. So easy, and so darling!

Tuesday, March 22, 2011

Do It Yourself Toadstool Pencils!


My toadstool pencils started selling so fast that I had to raise the price in order to keep whatever sanity I have left. Which got me thinking....this is so simple, why not make a kit? Saves you money, and me time!


I'm a DIY kind of girl and I love passing on what I learn by trial and error. Sometimes figuring a project out is a very frustrating process and I think that's why I love selling my various DIY kits so much. I love making creativity simple!

Plus, this way, you can make a simple and unique gift and say "I made it myself!"

Thursday, March 10, 2011

Tactile Button Snake Tutorial

I've been working on a plan to keep Daniel busy during our upcoming plane trip to Florida and I definitely have the tendency to go overboard! I love toys, I love gifts, I love making things, I love Daniel and I HATE trying to keep a kid happy in an enclosed space. So, inevitably, I will have too much! But the good news is that it means lots of travel toy ideas for my readers!


This week I made a classic Montessori toy with a twist and I think he will love it. Button snakes are great for fine motor skills and learning how to button. They're usually made with all felt squares, but I wanted to add another element to the activity, so I didn't stop there. I used some wool felt, some old felted sweaters, leather scraps, crocheted cotton squares and cotton fabric.


Making your own is so easy!

You'll Need:

6 inch length of ribbon
1 medium sized button
Any combination of wool felt, fabric, felted sweaters, crocheted squares, leather scraps, paper, fabric etc
Needle and thread

1.) Cut your length of ribbon. Fold over the end twice (like a small hem) and sew your button onto the ribbon tightly.

2.) Make a template for your squares approx 1.5" square. Cut out all your pieces. Making it all out of felt is definitely easiest! If you are crocheting squares:
Row 1: Ch 7, turn.
Row 2: Sc into 2nd from hook and each after (6 sc). Turn.
Row 3-4: Ch 1 and sc 6 across. Turn.
Row 5: Ch 1 and sc in next 2 stitches. Ch 2, skip 2 stitches and sc in last 2 stitches to make button hole. Turn.
Row 6-8: Ch 1, crochet 6 across.
Row 9: Ch 1, sc all around the edge to finish.

3.) Fold each square in half and cut small slits (button holes) in the center.

4.) Choose a square for the bottom of the button snake (you could also use a large button to keep the squares on). Fold the end of the ribbon under to hem and zig zag stitch it on like it's about to endure a nuclear war. Or hand sew if you have no machine!

Simple, right? Depending on your child's interests, you could do shades of the same color, black and white, shapes, patterns, make it seasonal, different sizes of squares etc.

Hopefully he'll have fun and learn something useful. And stay busy on the plane.

Thursday, February 3, 2011

Easy Dinosaur Costume Tutorial


Daniel's preschool had Dino Day last week and I somehow missed them memo about dressing up or bringing along a dinosaur toy. Naturally, I chose the ridiculous option of making a costume myself the night before. Much easier than buying a $2 toy...right? Besides, I'm pretty sure there were at least 3 dinosaurs at Halloween.

I wanted it to be cheap, quick and fun so I decided to make the costume on a hoodie (we got ours at American Apparel) so I could take it apart and put the sweater in his closet.


You will need:
Hoodie in color of your choice
Stiff felt in contrasting/co-coordinating color (minimum cut, 0.2 m was plenty)
Regular felt (not flimsy craft felt) to match hoodie (0.2 m)
Stuffing (wool or recycled polyfil are best)
Enough elastic to go around your child's waist OR 2-3 safety pins


1. Fold the matching, soft felt in half. Cut a tail shape approx 4" tall and 20" long.


2. Cut triangles out of the stiff felt. I cut a 3" strip out of the felt and cut triangles with a base that is slightly smaller than the sides. Aprrox 3x3x2.5". Pin the triangles into the fold of the tail.


3. Trim the end of the tail to the edge of the last triangle and sew the triangles onto the tail. Stuff the tail.

4. Pinch the opening of the tail closed perpendicular to your seam and pin. 


5. Sew the tail shut. The beauty of using felt is that there is no turning. That's part of the reason this project is quick! You can either use safety pins to fasten the tail onto your child's pants, or sew a length of elastic (1 inch shorter than your child's waist measurement) onto the tail. I sewed mine on the under-side of the seam that closed the tail up.


 6. Cut more of the same size triangles out of the stiff felt and cut a small slit in the center of the bottom side of each triangle. You will need 4-6 depending on how big they are and how big the hood is.


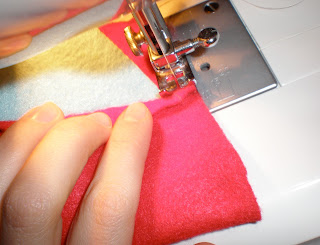
7. Line each triangle up, one at a time, on the center seam of the hood. One side of the slit goes on the left of the seam, and one side on the right. Sew with a running stitch, and NO back stitching, along each side of the split to fasten the triangles. This is the hardest part.

I didn't back stitch and used a running stitch is so I can easily rip it out after. If you want yours to stay on forever, by all means do it differently!

8.  Next, I cut out little claws to attach onto the sleeves. Same thing, running stitch and no back stitching.


9. Now to embellish! I used small and large circles on the back and chest only. I tried using a fabric spray adhesive to keep the felt on the hoddie, but it wouldn't hold. I think if I could have found a thinner felt in the same blue, the spray adhesive would have worked. Instead, I sewed just a few stitches in the center of each circle so I could take them off easily.

Sparkly felt, an oval-shaped tummy on a pullover sweater or multiple colors would be fun too.


And here's my little dinosaur all dressed up. Ironically enough, he was the only one with a costume! Maybe I need to drink less coffee!

Wednesday, November 10, 2010

Sock Monster Tutorial


Last night I made my very first sock monster, and this is how I did it! Please excuse the photos. It was late, and dark!


I used the heel of my sock as a bum for my little monster, because I wanted her to be able to sit.


Then I cut a small V at the toe of the sock (for ears/eyes). And a slit at the bottom for legs. Make sure not to cut too high on the legs...it should be just a bit below the heel of the sock (the 'bum'). Turn inside out and sew, right sides together, the V for the ears, and the all round the legs. Your monster will be sewn shut with no way to turn right side out, but don't worry!


Next, cut VERY small holes for the arms. They will stretch out a lot, so keep them small. SMALL. Then, flip the monster right side out through the arm holes.


And stuff...

Now for the arms. One the other sock, cut in half lengthwise from the opening to the heel, and across to make 2 arms. I wanted my little monster to have 2 fingers, so I cut a small V in the top of each arm.


Turn inside out and sew, right sides together, leaving the base open. Turn, stuff and sew onto the monster, right where that little hole is. Then, make sure your monster is full enough with stuffing and attach the other arm.


Sew on eyes, and add a felt mouth. I glued the felt on because I was getting tired! I also added a sweet little felt heart by her bum.

If you leave an opening when sewing your monsters legs to turn it inside out and stuff it, you can sew the arms completely shut (after turning and stuffing) and sew them onto the sock without cutting openings. I chose to do it my way because it was faster and I wanted my monster to be a bit funny looking. The other way would look a bit more polished I think.

I am about to start selling DIY Sock monster kits in my Etsy shop, and I think they'll make great gifts for older kids learning to sew.

You Might Also Like:

Related Posts Plugin for WordPress, Blogger...