Showing posts with label homemade gift. Show all posts
Friday, February 24, 2012
Easy Custom DIY Decor- Yarn and Twine Wrapped Ball Tutorial
Here's a super easy project that you can customize for your color scheme; yarn wrapped balls.
Materials:
Glue Gun or Glue Dots
Yarn/Twine/String/Rope
Styrofoam balls in desired sizes
Instructions:
1.) Glue one end of your yarn to the Styrofoam ball.
2.) Wrap and wrap until it's all covered and looks pretty.
3.) Cut the yarn and glue the other end down.
Yup, easy as 1-2-3. A cool DIY design project done in 20 minutes.
This would be a great housewarming or hostess gift! Easy, cheap, fast and made to co-ordinate with their decor!
Labels:
cheap,
colors,
custom,
decor,
diy,
easy,
fast,
gift,
home,
homemade gift,
hostess gift,
housewarming gift,
how to,
make,
quick,
rope,
scraps,
tutorial,
yarn,
yarn balls
Wednesday, November 16, 2011
Seasons Coasters from my Little Artist
I have been running around like a chicken with my head cut off for the last two weeks. Lots of family emergencies (everyone's ok now) and getting ready for a craft sale has made it almost impossible to try any new projects or sit down to blog. But I miss my blog so I had to pop in to show you a present from my little guy.
We went ceramic painting a few months ago and I chose coasters for Daniel because I knew it would be like four separate paintings and take him a little longer than just slathering something in purple for 3 minutes!
I suggested he paint the seasons and he did a great job. I was going to suggest giving them to his Gramma and Grampa for Christmas, but when we picked up the package from the shop and he said they were for his Dad and I, they went straight onto the table! I thought I should share before Christmas in case you're looking for a gift for your little one to give this year.
Labels:
4 seasons,
activity,
birthday gift ideas,
ceramic,
christmas,
coasters,
dad gift,
gift,
homemade gift,
how to make,
idea,
kid gift,
little kids,
mom gift,
preschool,
school age,
seasons,
teacher gift
Friday, July 23, 2010
Traveling Gnomes
I am always thinking of ways to keep Daniel entertained when we are shopping, in the car or at a restaurant. We have the standard travel toy ideas down. Stickers, doodle board, crayon roll, photo album, something with buttons, calculator, pipe cleaners, I-spy bottle, magnet games and on it goes.
When I was a little girl I had these cute
little dolls that clipped into jewelery that I would bring when my mom was meeting a friend for coffee. They were SO fun! I wish I have never sold them and I really I could remember what they were called. I was after the same sort of idea for Daniel, but what jewelry can you put on a boy?
I decided on a little, Waldorf gnome that fits into a pouch on a necklace. It was one of the first toys I've made that he actually liked. Well, for a few hours anyway. The little girl I take care of liked it so much that I made one for her too.
I read that it is wise to make the body first, because you can more easily make the head to fit the body than vice versa. I just winged it all. I free handed the bodies onto pattern paper and then cut and sewed. I usually make dolls too skinny so it took a few attempts. I wish I had made the hats a bit longer so I could knot them at the end; I like how the hat flops over when it's knotted. The head is just a ball of wool roving tightly wound. They joy of making little dolls is not having to fuss with the head!
I originally made a wool felt leaf for the gnome to fit in, but it just didn't work out that well. Since taking the photos, I've made him a crocheted pouch like the girl gnome. I crocheted a rectangle long enough to fold over into a sleeping bag. Before tying off, I chained to make the necklace and slip stitched it to the other side. Then to finish, I folded the rectangle up and stitched the sides together. It's a much better fit than the leaf!
Labels:
boy,
crochet,
girl,
gnome,
homemade gift,
homemade toy,
homemade travel toy,
natural,
nature,
pocket,
sew,
simple,
small,
tiny,
waldorf doll
Tuesday, July 20, 2010
Homemade baby shower basket
Fabric Beach Ball:
This ball was based on 2 tutorials:
http://www.craftideas.info/html/ball_tutorial.html
http://www.purlbee.com/fabric-beach-balls/
They were both great tutorials, and I should have followed them more closely! I chose to use wool felt for the little circle because I didn't trust my tucking-in-a-circle skills and there is no need to hem felt. It has the added bonus of another texture for a curious baby. I added a container with noisy beads to the ball so it rattles when it rolls.
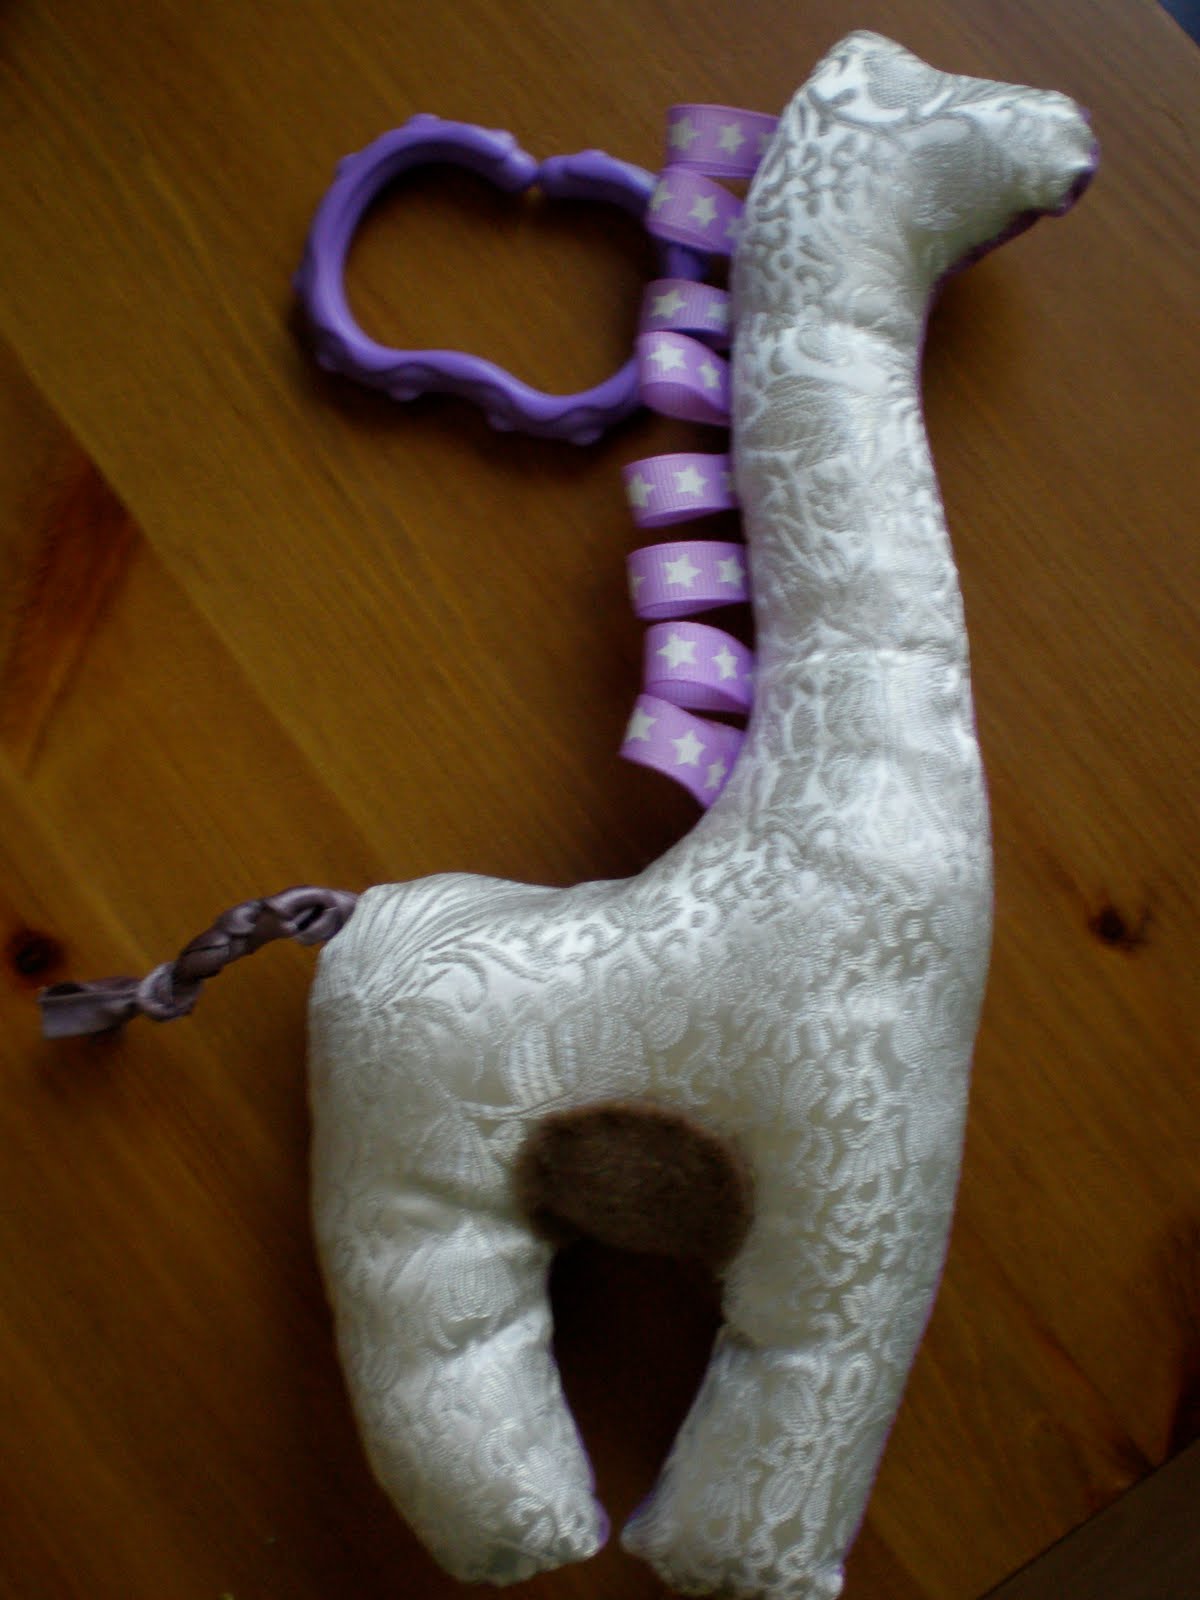
Giraffe Softie:
This adorable pattern is found over here (and can alternately be a dinosaur softie).
I embellished it by sewing ribbon loops along its neck and a braided satin tail. The other side of the giraffe is purple cotton and he has a squeaker in his bum! So cute! I ended up buying and sacrificing a cheap dog toy because I have no idea where one finds squeakers...
Teething Ring:
This is my take on a teething ring I saw in Chapters a long time ago. I love wooden teething rings and thought adding something soft was a great idea. I crocheted (with worsted weight cotton) a small rectangle, and then rather than tying off and sewing it in a loop, I slip stitched it across.
Crinkly Taggie Blanket:
Here is a link to one great tutorial, but there are many!
I also used a few leather scraps as loops for another texture. And from what I've heard (and it worked for me) cereal bags give the best crinkle. I did one side in cotton and the other in fleece. Another cute tutorial for a baby boy is here, at Prudent Baby.
First Waldorf Doll:
I love Waldorf style dolls! They make a perfect first doll because only natural materials are used and the simple style allows much imagination. There are a ton of great tutorials on all kinds of dolls. I made one earlier this year for Daniel, so this is based partly on that experience and partly on this tutorial.
I also took my first stab at embroidery and it came out ok! Woo Hoo!
Fabric Nursery Blocks:
I spent a ton of time at the fabric store, looking for co-coordinating fabrics and am so happy with how they all look together! I wanted them to be fun to play with, so I added a crinkly cereal bag to two side of the large block, bells to the medium one, and a crocheted panel to the little one. I should have been a little more careful with the seam allowance, but they still turned out ok. Tutorial here.
I am pretty happy with how everything turned out, and I learned a ton! The giraffe and Waldorf doll are my faves. I also added a few plastic links for clipping toys onto the carseat and a couple cloth diapers in a homemade drawstring bag. There is a good tutorial at Purl Bee.
Monday, July 19, 2010
Make your own lacing cards
Last year we decided to do an entirely handmade Christmas. It was a much bigger project than I thought, but so worth it! These are the lacing cards that I made for Daniel. I was inspired by some Martha Stewart Alphabet Cards and this tutorial over at Little Birdie Secrets.

I punched holes all the way around all 26 cards and then laminated them afterward. If you punch first and then laminate, you have to punch it out again, but you get a better seal around the holes. With my very active, very boyish little one, sturdy is VERY important so it was well worth the time for me. Since there were so many cards, it was challenging to keep this project at a resonable budget. Who knew laminating ($40 for 13 sheets at staples!) and shoelaces ($1-2/pair x 13=$3-26) could be so expensive! It almost became a $50 project! Luckily, my church let me use their laminating machine and I found a case of vintage shoelaces cheap on ebay!
I just brought them out again, and am hoping he will get the hang of it now that he's almost 3!
Subscribe to:
Posts (Atom)