Showing posts with label small. Show all posts
Wednesday, May 9, 2012
Cutest Soccer Snacks
Cucumbers and cheese biscuits aren't usually the most exciting snack, but packed up this cute they sure are! I used cellophane bags, blank business cards and stamps to package the biscuits and press-n-seal wrap to pack up the cucumbers. Our U6 team definitely seemed to enjoy.
Labels:
biscuits,
children,
cucumber,
fun,
healthy,
healthy kids snack,
ideas,
individual,
kids,
kids snacks,
package,
packaging,
packaging ideas,
party,
picnic,
presentation,
small,
snack,
sports
Thursday, September 29, 2011
Mini I-Spy Doll AND Tummy Time Quilt
Here is the mini I spy quilt I made for my goddaughter. Part of the Baby Shower gift basket. I made it big enough for tummy time, but small enough to use as a doll quilt when she's a little bigger, about 32"x 32".
I adore I spy quilts, but I really hate quilting, so mini is perfect! I decided to round the corners, use a zig zag stitch and embrace the quirkiness of my quilting skills. At least on the second attempt, the squares all lined up!
I've also finished my first I Spy crib quilt for sale. This one is not quirky at all! Just plain cute. I'm debating about listing it in my shop. I really love the cotton candy colors!
And last but not least, this little gem that's already been snatched up! I used a simple, self binding method and I think it may have won me over to quilting! It's so much easier.
Labels:
baby shower gift,
doll quilt,
Eye Spy,
girl,
handmade,
handmade quilt,
homemade,
I Spy,
Quilt,
quilting,
self binding,
sew,
sewing,
simple,
small,
tummy time quilt
Thursday, August 4, 2011
Adorable No-Sew Felt Box
Check this template out!
Adorable! I used very stiff felt and embellished it with sequin trim. Perfect wrap for little gifts.
Tuesday, June 7, 2011
Travel Toys and Activities
| #1- Crafts |
I just realized that I still haven't posted photos of all the bits and pieces we took on our trip with us! Some were mainly for the plane, and some mainly for the hotel.
| #2- Squinkies |
| #3- Activities |
A couple of tips: save some "new" things for the way back, bring comfortable headphones for airplane television or iPod's and consider wrapping everything up in wrapping paper for little ones-it can keep them pretty busy!
| #4- Thinking |
| #5- Busy Toys |
#1- Crafts: Blackboard and Chalk (in a chalk holder) with eraser, crayons, notebook and stickers galore!
#2- Squinkies: I love these because they're tiny and lots of fun. We put them in a small tin from Michael's to keep them together.
#3- Activities: Jacob's Ladder, Button Snake and a lunch tin filled with puzzle erasers in a home theme.
#4- Thinking: Usborne's 'Things to do on a Journey', key chain measuring tape and tiny package of Megablocks (they were very popular in the hotel!)
#5- Busy Toys: Wiki Sticks (Daniel's favorite of the trip), Silly bands (second favorite!), play doh (great for the hotel) and a locking diary. I thought the diary would be a huge hit, but the lock was too cheap and didn't work at all. Next time I'd buy a separate lock and key for entertainment.
#6- Things That Go: The roll up mat was pretty good on the airplane's tray table, but we used both of the car toys much more at the hotel. I really liked the little Tonka ramp because it was small and easy to pack, but lots of fun at the hotel.
Saturday, March 19, 2011
Tutorial Test Drive: On The Go Activity Mat
The Fiskars blog has a neat tutorial for a roll up play mat. I loved the ideas for the car wash and the gas station so I adapted it for our upcoming trip.
I also used a lot of hot glue, rather than stitching everything. It doesn't look as pretty but it takes the skill level down from advanced to intermediate and was way faster! It also allowed me to leave the car wash 'open' so the car can tuck inside for a wash up.
Rather than a pond and a construction site like on the Fiskars tutorial, I made a tunnel and a house with a garage. I didn't have any tiny construction vehicles or boats, so I thought it would be more fun to have a tunnel to drive through (just a little felt rectangle stitched down) and the little garage to park in. I made the garage by snipping the corners off a rectangle, stitching that same end down and then stitching the sides the same as with the tunnel.
The Fiskars tutorial is awesome, and looks far more professional, but I am so glad I cut some corners to make it faster. I had this done in an hour and a half and I think Daniel is going to love it!
Monday, November 22, 2010
Giveaway Winner and Craft Sale Recap!
The winner of the mini wooden matching game is:
Gianna!!
I don't have your info, so please contact me this week to claim your prize!
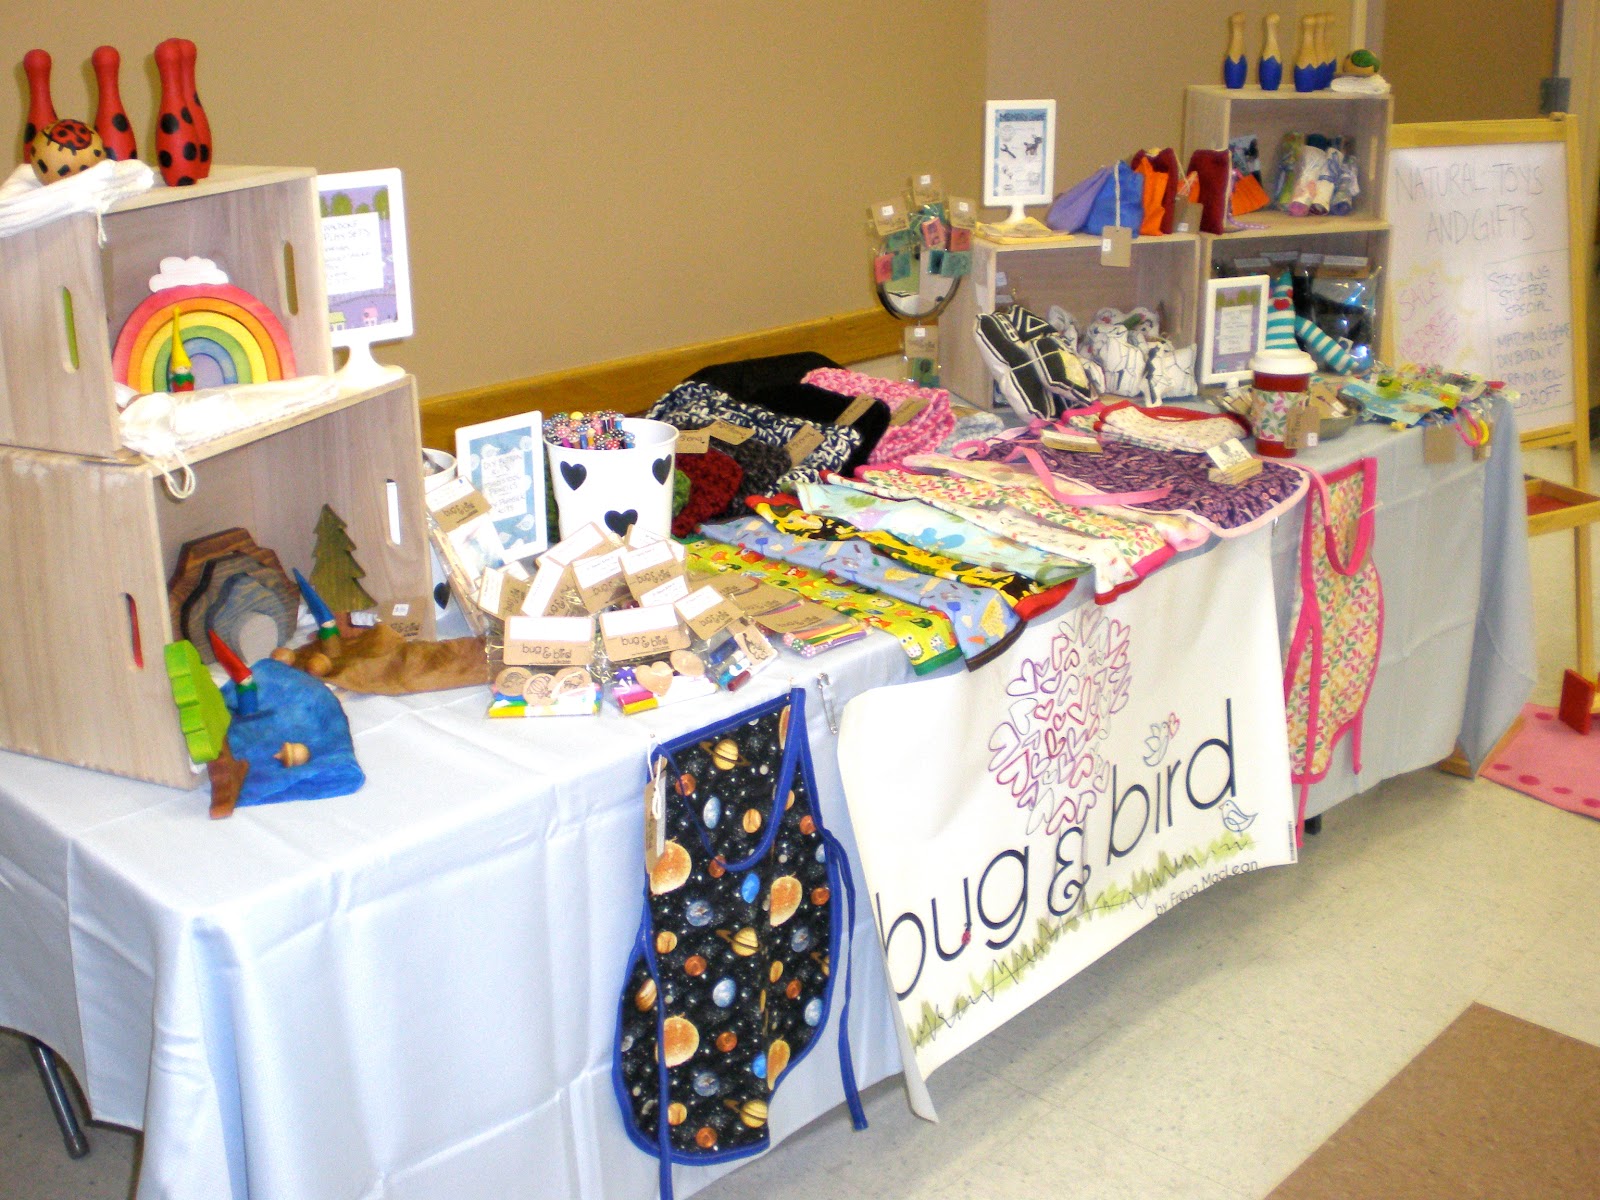
I feel like I'm finally back to normal life. This weekend was busy at the Edgemont Craft Sale and a last minute table at the AP Village Craft and Bake sale. Both were great successes! I had a ton of friends and some family stop by, and I was so overwhelmed with all the love. Awww...sappy moment :)
I learned a lot about what people like most and what sells fast. I also learned that I hate making some things in big quantities! I am considering a booth at Mommylicious, Naturally, and the Lilac Festival...big fees and big attendance! It's a tough leap to take!
A few tips on the table:
I got these awesome boxes at Jysk for $50 or so. They helped me to create levels which is so important with small items!
Tablecloths can be crazy expensive ($70 at Home Outfitters!!) but I found some great deals on nice ones at Homesense and Superstore.
My easel was only $20 at Ikea (well...Daniel's easel) and was great for posting my specials. I also found those great frames which I used as signs for .99 cents! Woot!
Since I sell kid's stuff, I had a couple of wooden toys on a small carpet. That way, kids were happy and mom could take her time looking!
Labels:
craft,
craft fair,
craft sale,
giveaway,
ideas,
merchandising,
selling,
set up,
small,
table,
tips,
vendor,
winner
Friday, July 23, 2010
Traveling Gnomes
I am always thinking of ways to keep Daniel entertained when we are shopping, in the car or at a restaurant. We have the standard travel toy ideas down. Stickers, doodle board, crayon roll, photo album, something with buttons, calculator, pipe cleaners, I-spy bottle, magnet games and on it goes.
When I was a little girl I had these cute
little dolls that clipped into jewelery that I would bring when my mom was meeting a friend for coffee. They were SO fun! I wish I have never sold them and I really I could remember what they were called. I was after the same sort of idea for Daniel, but what jewelry can you put on a boy?
I decided on a little, Waldorf gnome that fits into a pouch on a necklace. It was one of the first toys I've made that he actually liked. Well, for a few hours anyway. The little girl I take care of liked it so much that I made one for her too.
I read that it is wise to make the body first, because you can more easily make the head to fit the body than vice versa. I just winged it all. I free handed the bodies onto pattern paper and then cut and sewed. I usually make dolls too skinny so it took a few attempts. I wish I had made the hats a bit longer so I could knot them at the end; I like how the hat flops over when it's knotted. The head is just a ball of wool roving tightly wound. They joy of making little dolls is not having to fuss with the head!
I originally made a wool felt leaf for the gnome to fit in, but it just didn't work out that well. Since taking the photos, I've made him a crocheted pouch like the girl gnome. I crocheted a rectangle long enough to fold over into a sleeping bag. Before tying off, I chained to make the necklace and slip stitched it to the other side. Then to finish, I folded the rectangle up and stitched the sides together. It's a much better fit than the leaf!
Labels:
boy,
crochet,
girl,
gnome,
homemade gift,
homemade toy,
homemade travel toy,
natural,
nature,
pocket,
sew,
simple,
small,
tiny,
waldorf doll
Subscribe to:
Posts (Atom)